

In this post, we will discuss the Step-By-Step Guide To Apply IPO Through Zerodha. Before coming to the main point let’s discuss what are the pre-requisites.
- Zerodha Demat account name
- Zerodha’s Demat account number
- PAN number
- Internet banking with full transaction rights
- Money in the bank account
Those who have an account with Zerodha can apply for an IPO through some easy steps and guidance. Now, first, I will explain the process for those who do not have accounts in Zerodha.
How do Apply IPO through Zerodha?
For obvious reasons, first, they need to open an account under Zerodha. And, to facilitate the process, I’ve created an easy link here. Those who have an Aadhar card can easily complete the process within 10 to 15 min. You need to just click on the link below and you’re ready to go.

Now, let’s move on to the next part. And, this is for Zerodha clients or Zerodha account holders. At the beginning of the content, I mentioned some of the necessary pre-requisite for applying for IPO through Zerodha. After having those requirements, here is the step-by-step further guide for them.
For Applying IPO, the most important part is the payment. Based on the payment method, we are able to divide the steps according to it. First, we will discuss the latest and quick method of applying IPO with UPI.
Apply IPO Through Zerodha with UPI
So, firstly, I will head forward to UPI (Unified Payment Interface) method. This is an instant real-time payment system, an inter-bank transaction method. It is the easiest method in comparison to net banking. So, let’s begin.
Visit the IPO Application Page
Step 1: You just need to click on the link below. And, in just a click you will get the main page of the IPO application.

Select the IPO
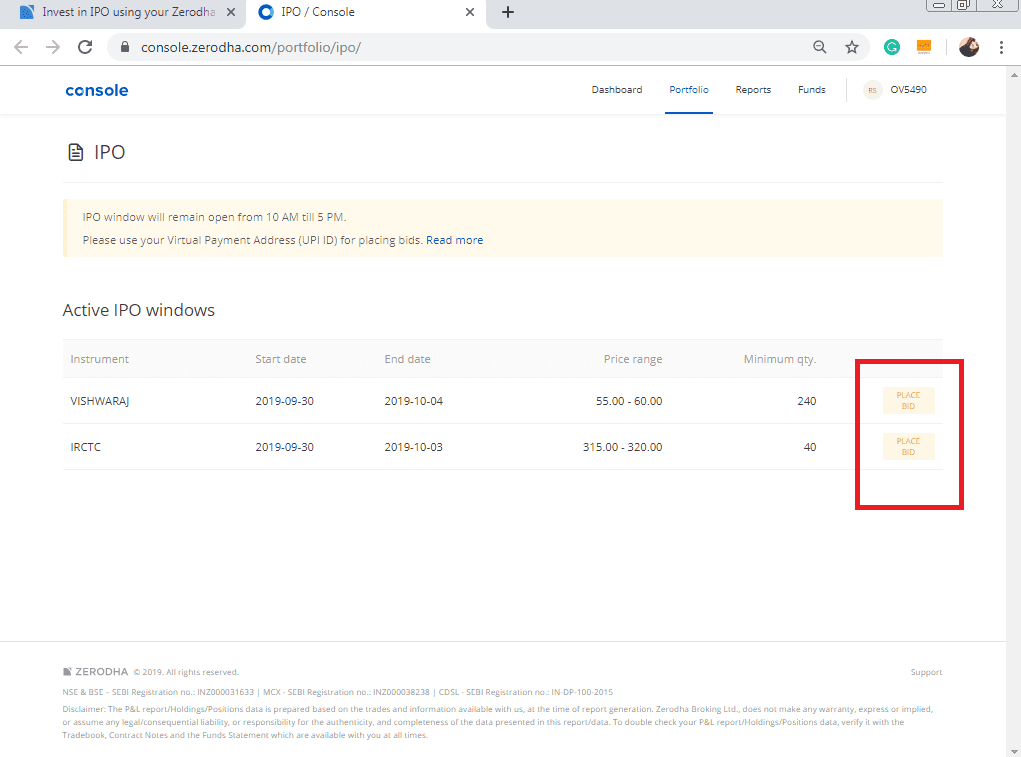
Step 2: Now, you can select the IPO you want to apply for from the list of open issues or active IPO windows.
Check the Details of the IPOs
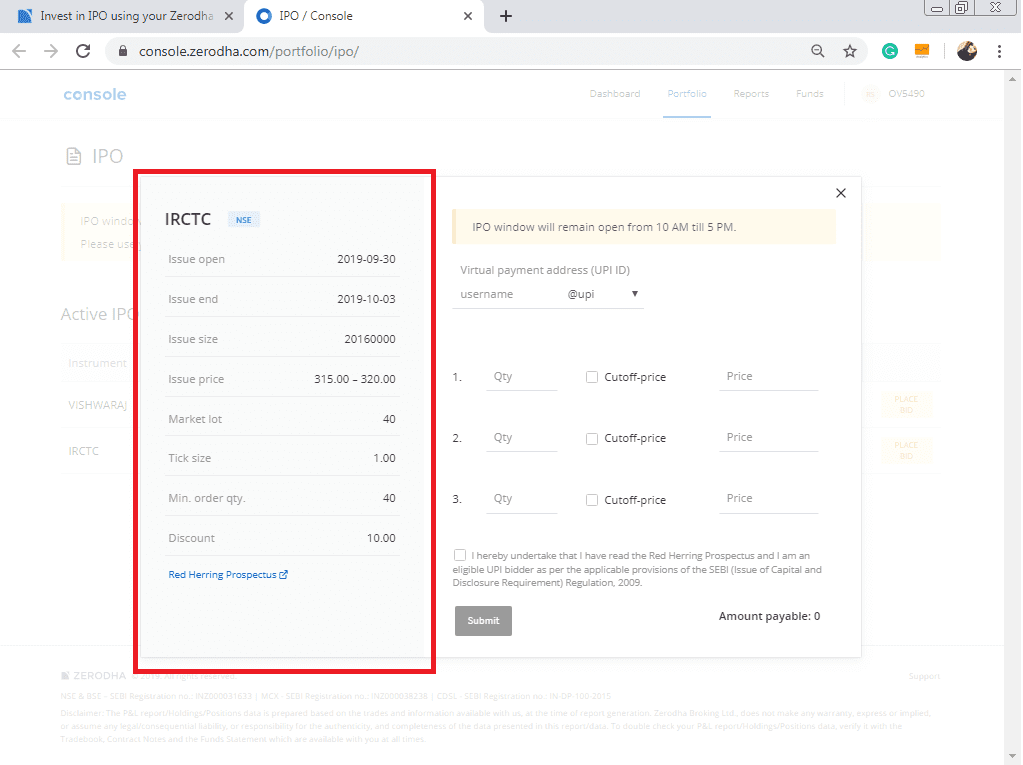
Step 3: When you select an IPO to apply for, you will get to see all the details of the offer. For instance, open date, close date, issue size, lot size, DRHP, etc.
Enter Your UPI ID
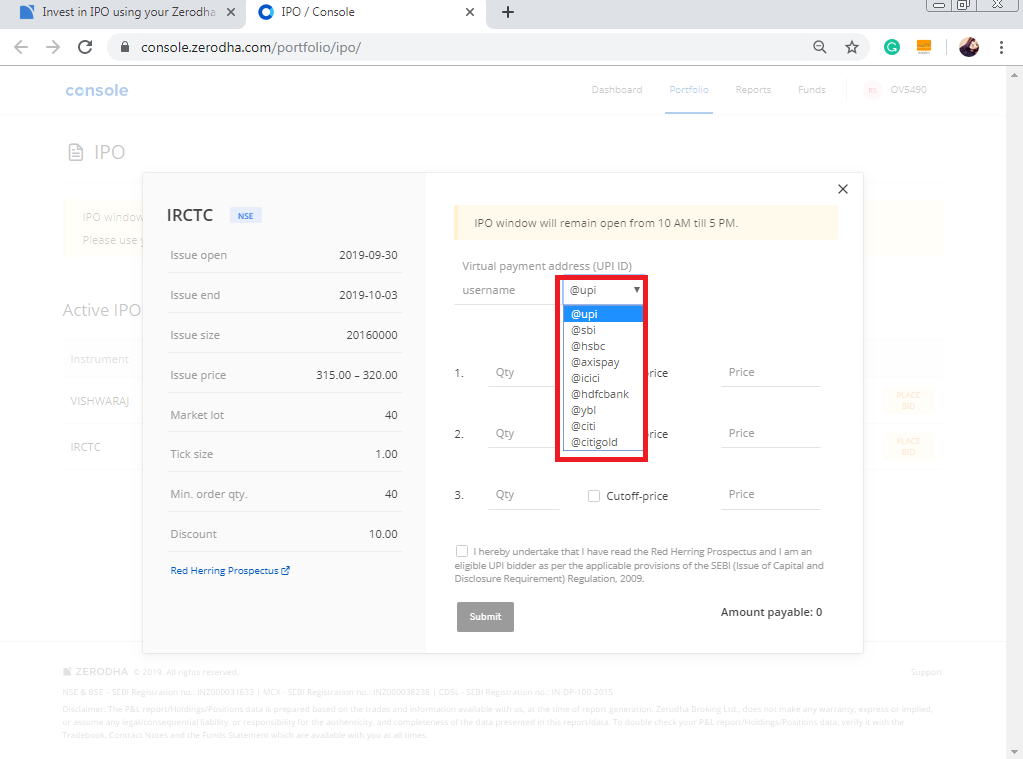
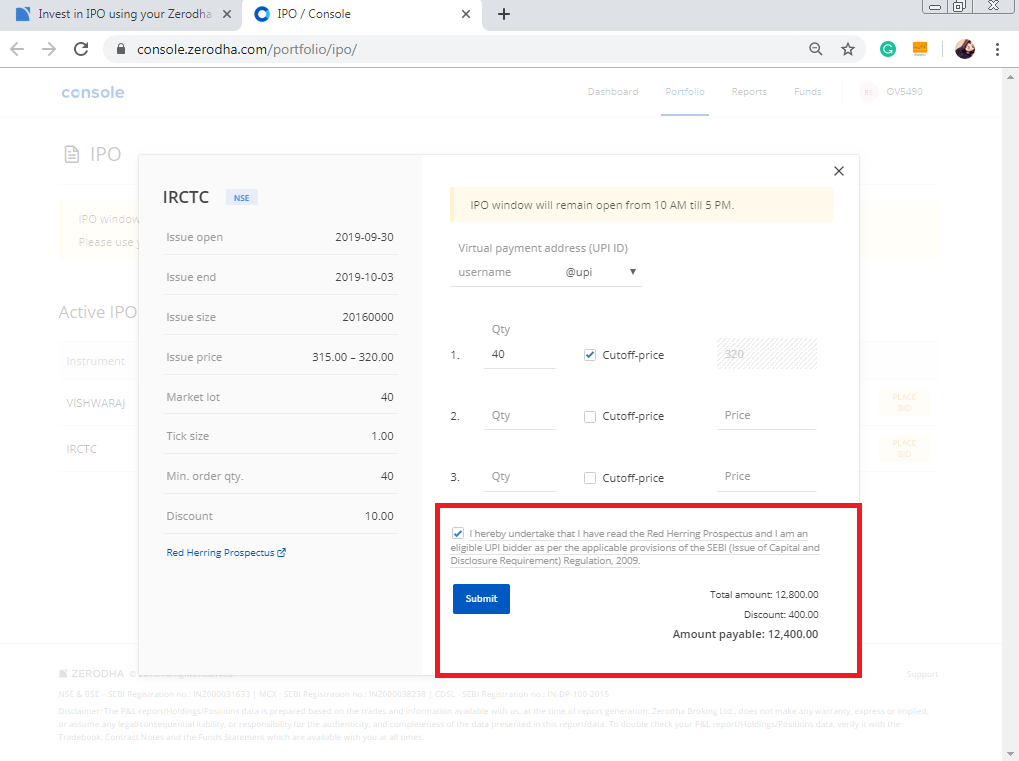
Step 4: Here, you have to enter your UPI ID. Besides this, make sure that this is the UPI ID mapped to your personal bank account. But, one thing you should remember is that the IPO application is liable to get rejected if the person who is applying is different from the one whose bank account is used to apply.
Place the Bid
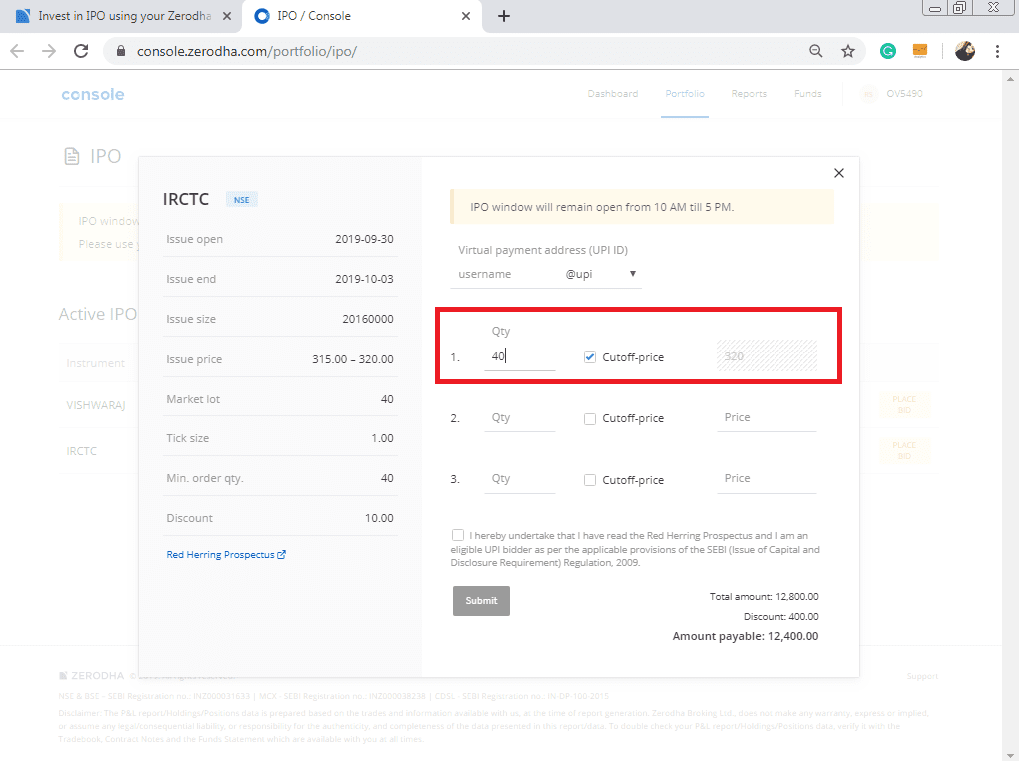
Step 5: Then, while placing the bids, must remember only quantity that is a multiple of the lot size is allowed. If someone wishes to apply at the cut-off price, then just click on the checkbox next to ‘Cutoff price’. And, if you want to place a bid at a different price, this can be done by entering a price in the ‘Price’ field.
Confirm and Submit
Step 6: After that, once you’ve completed all these steps, just click on the checkbox to confirm that you have read the issue size, lot size, and DRHP. Finally, click on submit.






Accept the UPI Mandate
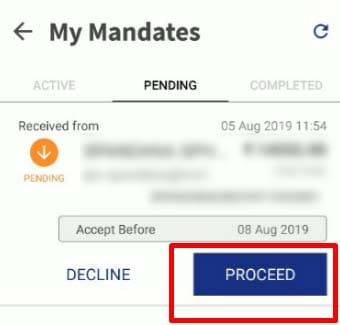
Step 7: Now, After clicking the submit button, you will get a mandate request on your UPI app. It may take a few hours to receive this mandate as in some cases the system is still in the initial stages of operation. Your next doing is to accept the mandate and you are ready to go.
This will block the fund required for the application in your registered bank account till the date of allotment. It generally happens 2 days before the listing date. And, if you receive an allotment, the money is automatically debited from the bank account. Shares will be credited to your Demat account.
The Exchange Confirmation
After submitting the IPO bid, at the end of the day, you will receive an SMS from the exchange. The message will confirm your application. Meanwhile, in order to check the status of your order, you can select the ordered IPO. Once you selected it, you will be able to see the last updated bid.
In case, if you don’t receive an allotment, the blocked funds are released on the date of allotment.
Real-Life Example of How I Applied for SENCO Gold through UPI
Recently, I applied for the SENCO Gold IPO through the Zerodha Platform. I used the UPI method.
Placing the Bids
Firstly, I went to the Orders tab and selected IPO from there. I placed a bid for 4 lots of the new issue. The lot size was 47. So, I applied for 47×4 = 188 shares.
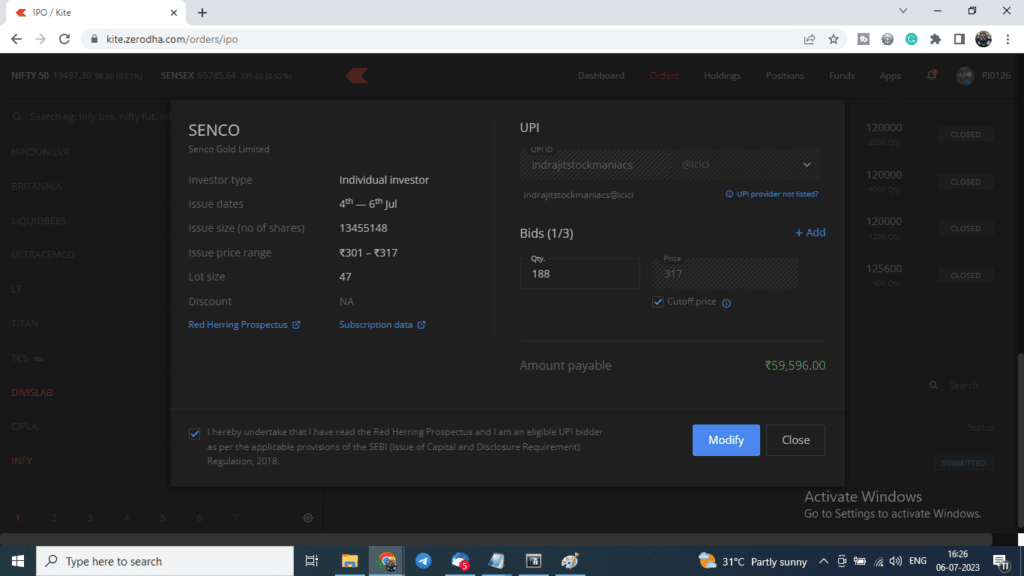
Once I submitted the bid it is shown as “Submitted” as per the following image.
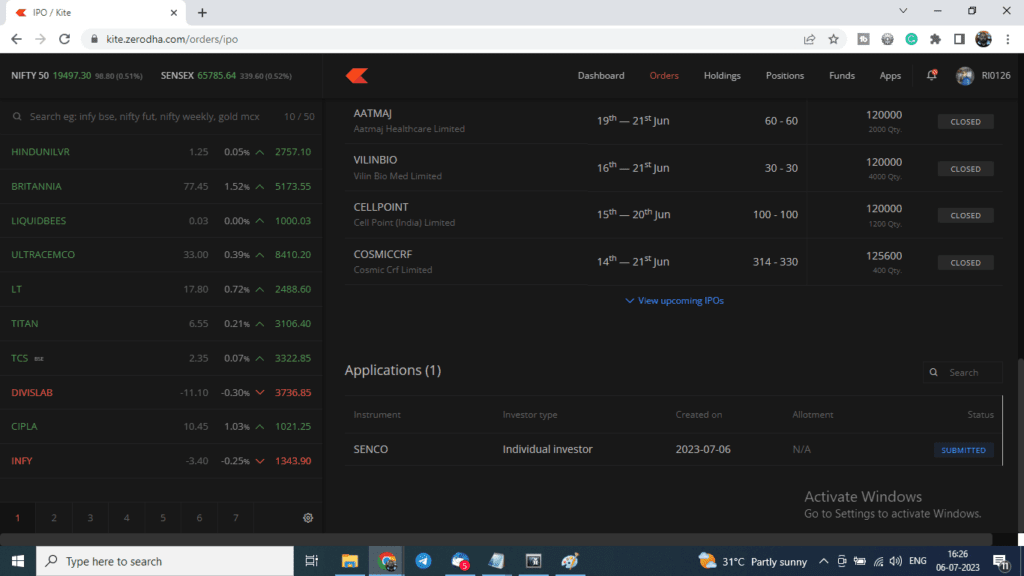
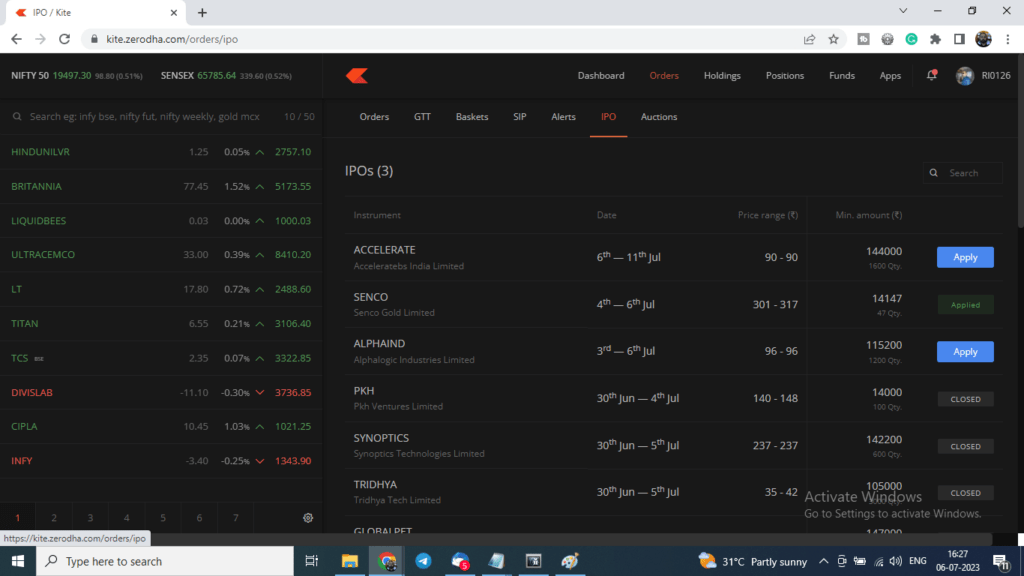
Now if I go to the Orders window and select IPO again, I can see all the upcoming IPOs, with the SENCO Gold issue at the utmost bottom. Check the image below.
Accepting the UPI Mandate
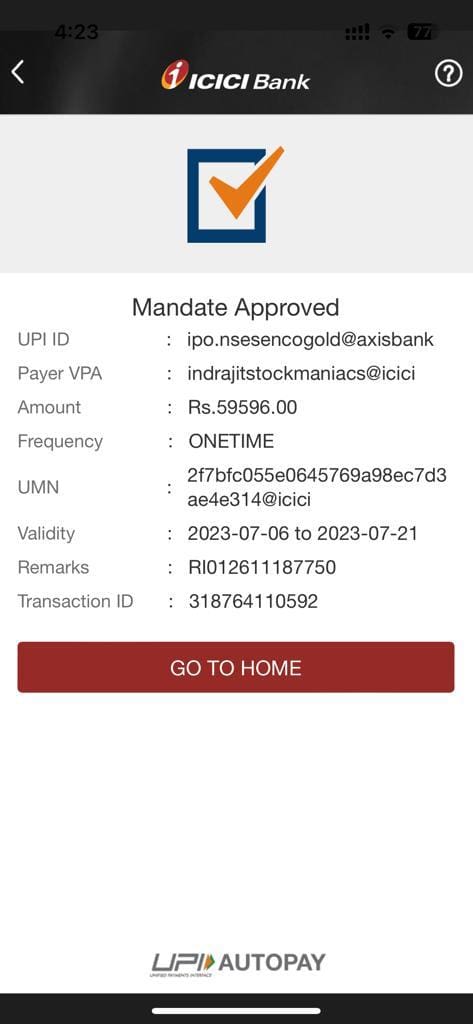
I have now received a UPI mandate in my ICICI Bank Mobile app. I accepted the UPI mandate and my order is now fully complete.
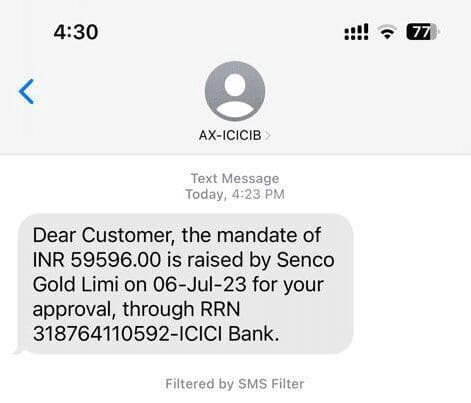
What is more, I have also received an SMS confirming the acceptance of the UPI mandate.
Listing of the Share
Out of 188 shares, i.e., 4 lots I got only 1 lot, i.e., 47 shares after the final allotment. The shares got a powerful listing on the listing day and I made some money from the IPO. Check the image below.

Apply IPO Through Zerodha with Net Banking
Now, let’s have a look at the old method of applying IPO through net banking. I will show an example of how to apply for an IPO through Zerodha with SBI net banking. Please note your PAN number registered in the bank should match the PAN number of the Demat account, else the IPO application will get rejected. So make sure you apply for IPO with your own Demat and your own bank account.
Note Down Your Demat Details
First, note down your Zerodha Demat details from the profile section of your Console back office in Zerodha.

Access the ASBA Service through Net Banking
Next login to your internet banking account. Here we will log in to SBI net banking. Once you log in, click on Demat & ASBA Services. ASBA means Application Supported by Blocked Amount. It means that once you apply for an IPO the applied fund will remain in your account but will be blocked till the IPO is allotted to you. In case it’s allotted it will be finally deducted from your bank account OR if you do not get allotment for the IPO the fund will be unblocked and you can use the fund for other works.

Next, click on IPO (Equity).

Now read the terms and conditions and click on Accept.

Place the Bids
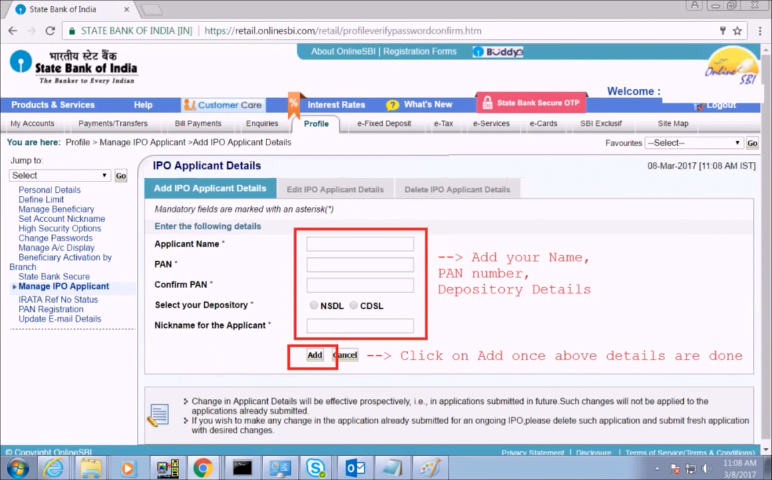
In the next screen put your name, and PAN number and confirm your PAN number. While selecting your depository click on CDSL. Now put up to 3 bids and click on submit.

Save Personal Details
You can check and save your name, PAN number and depository details in the profile section of your net banking for future usage so that you need not put them again and again.
Confirm Your Bid
Next, you need to confirm your bid for the IPO as shown below.
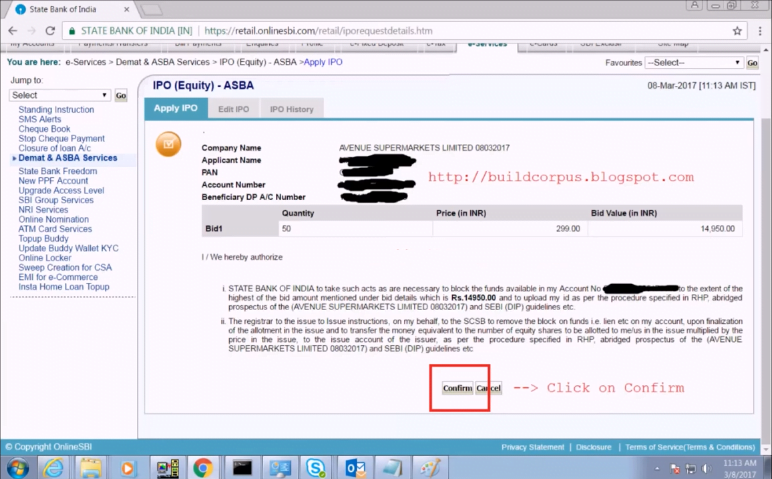
Once done the next screen will show you the IPO application final confirmation screen and will also reflect the amount of funds blocked for applying for the IPO.

Through the above write-up, I have shown you the method to apply IPO through Zerodha with the State Bank of India.
Conclusion
Though there are many other brokers who have IPO facilities, Zerodha is one of the best. The IPO application process is quite easy, simple and less time-consuming. You can apply for an IPO through Zerodha with multiple payment methods. For more updates, follow our site daily basis.